Call This
Saturday
to Get
$35 OFF


Call This
Saturday
to Get
$35 OFF

An AFCI (Arc Fault Circuit Interrupter) circuit breaker is an important safety device that helps prevent electrical fires. If you're comfortable working with electrical systems, install an AFCI breaker yourself. However, this task involves handling electricity, so if you’re unsure about the process or feel unsafe, hiring a licensed electrician is a good idea. Neighborhood Electric walks through the basic steps of installing an AFCI circuit breaker.
Before you start, ensure you have all the necessary tools and materials. Here’s a list of things you’ll need for the installation:
Once everything is gathered, ensure you have enough time to complete the project and remember to work safely.
Before touching anything inside the electrical panel, turn off the main power. Find the large switch at the top of your breaker box labeled “Main” and flip it to the off position. This will shut off power to your entire house.
Using a voltage tester, check to make sure the power is off. If you don’t have a voltage tester, you can always use a lamp or another device plugged into an outlet to ensure no power is flowing.
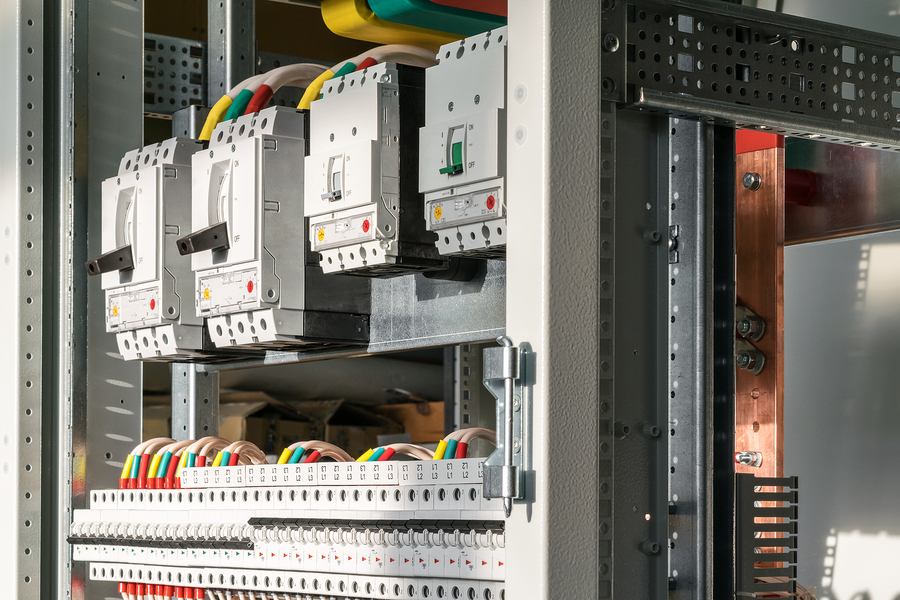
Once the power is off, use a screwdriver to remove the screws from the electrical panel cover. Be careful when removing the cover, as there are still some wires inside the box that could potentially hold a charge. Gently set the cover aside in a safe spot.
Before installing your new AFCI circuit breaker, you'll need to locate the breaker you're replacing. It should be labeled on the panel, showing which part of the house it controls. If your breaker box isn’t labeled, you may have to trace it manually by flipping switches and testing the outlets or lights that stop working.
If you’re unsure which breaker is causing problems, it might be best to call an electrical repair service in Hauppauge.
Now that you’ve identified the correct breaker, it’s time to remove it. First, disconnect the wire connected to the breaker by loosening the screw that holds it in place. Then, carefully pull the breaker out from its slot in the panel. Some breakers can be tricky to remove, so if you're having trouble, a gentle wiggle might help it come loose. But if you’re not confident doing this yourself, it's smart to contact a professional electrician for assistance.
With the old breaker out of the way, you can now install the AFCI circuit breaker. First, connect the neutral wire to the AFCI breaker’s neutral terminal. Then, connect the hot wire (usually black or red) to the breaker’s load terminal.
Next, find the neutral bar in your panel and attach the breaker’s white pigtail wire. The neutral bar is usually a long metal strip with multiple screws where other neutral wires are attached.
After all the wires are connected, carefully snap the new AFCI breaker into place. Make sure everything is seated properly and that the breaker feels secure.
Once the AFCI circuit breaker is installed, replace the panel cover and secure it with the screws. Be cautious not to disturb any wires when putting the cover back on. It’s also a good idea to check once more that everything is neatly arranged inside the panel and there are no loose wires or connections. If you’re unsure of any connections, calling an electrician for a circuit breaker repair can ensure the installation is safe.
After securing the panel cover, you can turn the power back on. Flip the main breaker to the "On" position, then flip the new AFCI breaker. Once the power is restored, go to the part of the house the breaker controls and test the outlets or lights. Everything should be working as normal.
If something doesn’t work or the breaker trips immediately after being turned on, there could be an issue with your wiring or the installation process. At this point, contacting a qualified electrical repair service is important. They can perform a circuit breaker replacement or identify any problems in the wiring that might be causing the issue.
While installing an AFCI circuit breaker can be a do-it-yourself project, it can sometimes be complicated. If you notice frayed wires, damaged insulation, or any sign of a more serious electrical issue, it’s time to call a professional. An electrician will know how to handle these problems and can ensure the job is done properly.
Additionally, if your breaker keeps tripping after installation, this could signal a deeper issue with your wiring. A professional electrical repair service can inspect your system and fix any problems you might have missed. In some cases, a complete circuit breaker replacement might be needed if the current one is faulty.
Installing an AFCI circuit breaker is a great way to make your home safer from electrical fires. While it’s possible to do the job yourself, don’t hesitate to seek help from Neighborhood Electric if you’re unsure.